-
Vue.js Tutorial
- vue.js-tutorial
- vue.js-installation
- vue.js-getting-started
- declarative-rendering
- conditions-loops
- vue.js-instances
- vue.js-template
- vue.js-components
- computed-properties
- vue.js-watch-property
- vue.js-event-handling
Data Binding
Transition & Animation
Vue.js Reactivity SystemThe reactivity system is one of the most distinctive features of Vue.js. In Vue.js, models are plain JavaScript objects. When we have to modify the models, the views are updated. This makes state management simple and intuitive, but it's also essential to understand how it works to avoid some common upcoming problems. Here, we will see how to deal with these problems by using the reactivity system. How does it work?If you pass a plain JavaScript object to a Vue.js instance as its data option, you will see that Vue.js makes this pass through all of its properties and convert them to getter/setters using Object.defineProperty. This is an un-shimmable and an ES5-only feature. Because of this feature, Vue doesn't support IE8 and below versions. The getter and setters are not visible to the user, but under the hood, they make Vue.js able to perform dependency-tracking and change-notification when you have to change or access the property. You can see the getter/setters properties changes on the browser's console. If you want to see them, you have to install vue-devtools for a more inspection-friendly interface. Every component instance has a corresponding watcher instance. This is used to record the properties "touched" during the component's render as dependencies. After that, when a dependency's setter is triggered, it notifies the watcher, which re-render the component in turn.  Vue.js Reactive InterfaceVue.js provides us an option to add reactivity to the dynamically added properties. Suppose, we have already created Vue.js instance and we want to add the watch property. See the following example: Example: Index.html file: Index.js file: Let's use a simple CSS file to make the output more attractive. Index.css file: After the execution of the program, you will see the following output: Output: 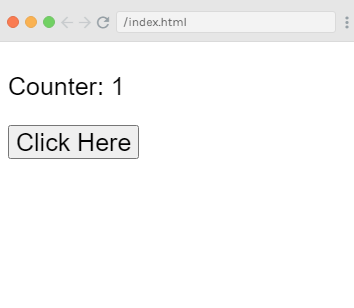 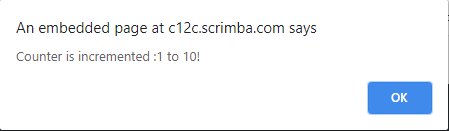 When you click on the "Click Here" button, the counter will be incremented. You will see a pop-up output or an alert message that shows the counter property's changed value. See the following output after we have clicked on the "Click here" button. 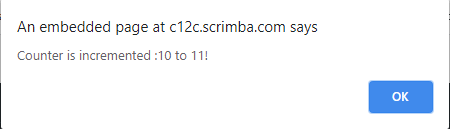 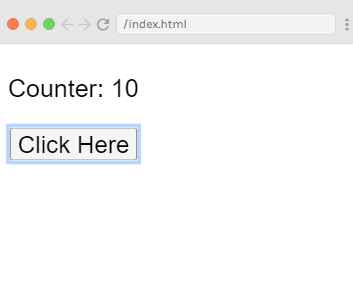 Example ExplanationIn the above example, we have defined a property counter that is set to 1 in the data object. When you click on the "Click Here" button, the counter will be incremented. After creating the Vue.js instance, we have to add the watch property to it.Use the following code to add it: We have used the $watch property to add watch outside the Vue instance. We have also added an alert used to show the value change for the counter property. A timer function is also added named setTimeout to set the counter value to 10. Whenever you click the button, the counter will be changed, and the alert from the watch method will get fired. Add properties at Runtime.It is the best way always to declare the properties, which need to be reactive upfront in the Vue.js instance because Vue.js cannot detect property addition and deletion. If you want to add properties at run time, you have to make use of Vue global, Vue.set, and Vue.delete methods. Vue.setThis is used to set a property on an object. This is used to overcome the limitation that Vue.js cannot detect property additions. Syntax Here, target: It can be an object or an array. key: It can be a string or number. value: It can be any type. Let's take a simple example to understand the concept of Vue.set. Example: Index.html file: Index.js file: After the execution of the program, you will see the following output: Output: 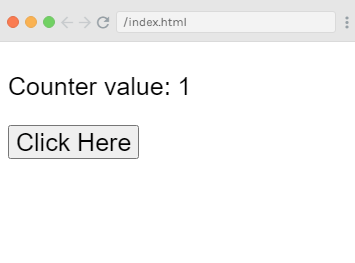 Here, you will see that the counter value will be increased every time when you click on the "Click Here" button. See the following output. Here, we have clicked button for 5 times. 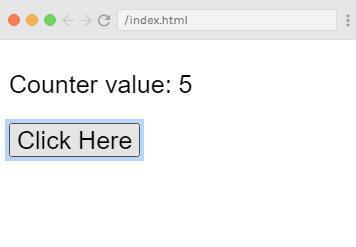 Example ExplanationIn the above example, we have created a variable named myproduct at the start using the following code: It is given to the data object in Vue.js instance as follows: Suppose, you have to add one more property to the myproduct array, after the Vue.js instance is created. You can do this by using the following code: If you see the output on the console, you will find that in products list, the quantity will be added. The get/set methods, which basically add reactivity, are available for the id, name, and price, and not available for the qty. So, you can see that the reactivity cannot be achieved by just adding the vue object. In Vue.js, you have to create its all properties at the start. If you want to do it later, we can use Vue.set. See an other example where all the properties are added later. Example: Index.html file: Index.js file: In the above example, we have used Vue.set to add the qty to the array using the following code: If you run this example on the console, you will see that the get/set for qty is added using Vue.set method. Vue.deleteThe Vue.delete function is used to delete the property dynamically. This is also used to overcome the limitation that Vue.js cannot detect property deletion. Syntax: Here, target: It is used to specify an object or an array. key: It is used to specify a string or a number. Let's see an example to demonstrate how to delete any property dynamically in Vue.js using Vue.delete function. Example Index.html file: Index.js file: In the above example, we have used the Vue.delete function to delete the price from the array by using the following code: When you see the output of the above example on the console, you will see that only the id and name are visible on the console as the price is deleted. We will also notice that the get/set methods are deleted. Next Topic#
|