-
Spring Tutorial
Spring in IDE
Dependency Injection
- ioc-container
- dependency-injection
- constructor-injection
- ci-dependent-object
- ci-with-collection
- ci-with-collection-2
- ci-with-map
- ci-with-map2
- ci-inheriting-bean
- setter-injection
- si-dependent-object
- si-with-collection
- si-with-collection-2
- si-with-map
- si-with-map-2
- ci-vs-si
- autowiring
- factory-method
Spring AOP
Spring JdbcTemplate
- jdbctemplate-example
- preparedstatement
- resultsetextractor
- rowmapper
- namedparameter
- simplejdbctemplate
Spring ORM
SPEL
Spring MVC
MVC Form Tag Library
MVC Applications
Spring MVC Validation
MVC Tiles
Spring Remoting
Spring OXM
Spring Java Mail
Spring Web
Spring Security Tutorial
- sp-security-tutorial
- sp-security-introduction
- sp-security-features
- security-project-modules
- sp-security-xml-example
- sp-security-java-example
- sp-security-login-logout
- sp-security-custom-login
- form-based-authentication
- sp-security-remember-me
- security-at-method-level
- sp-security-tag-library
Spring + Angular
Misc
Spring Boot
Spring Interview
Spring Angular CRUD ApplicationIn this section, we are going to develop a CRUD (create-read-update-delete) web application. This application contains the student form that includes the CRUD features like add, view, delete, and update student. In this integration, we are using Spring Boot to handle the backend part and Angular to handle the frontend part. Working of Application
Tools to be used
Technologies we usedHere, we are using the following technologies:
Create DatabaseLet's create a database indigo. There is no need to create a table as Hibernate automatically created it. Spring ModuleLet's see the directory structure of Spring Boot we need to follow: 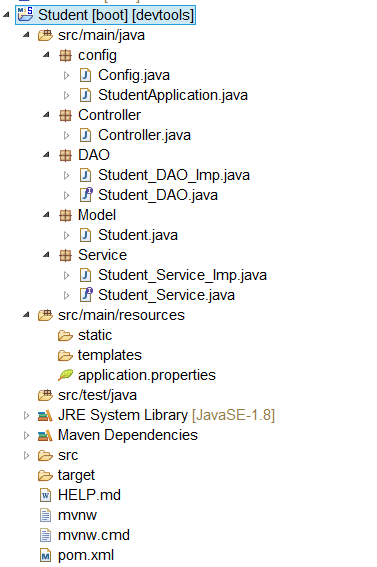 To develop a CRUD application, follow the below steps: -
Config.java StudentApplication.java
Student.java
Student_DAO.java
Student_DAO_Imp.java
Here, we are creating a service layer interface that acts as a bridge between DAO and Entity classes. Student_Service.java
Student_Service_Imp.java
Controller.java
application.properties Angular ModuleLet's see the directory structure of Angular we need to follow: 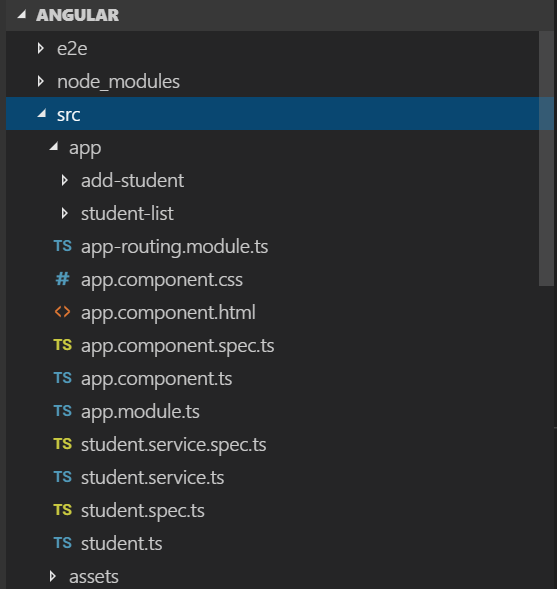
Let's create an Angular project by using the following command: ng new Angular 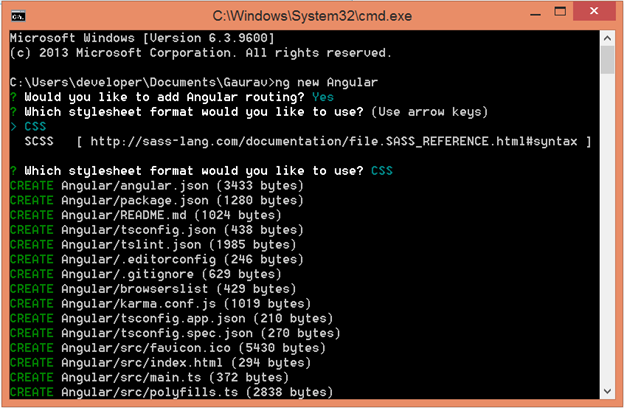  Here, Angular is the name of the project. Install Bootstrap CSS frameworkUse the following command to install bootstrap in the project. npm install [email protected] --save Now, include the following code in the style.css file. Install Angular-DataTableUse the following command to install angular datatable in the project. npm install angular-datatable --save 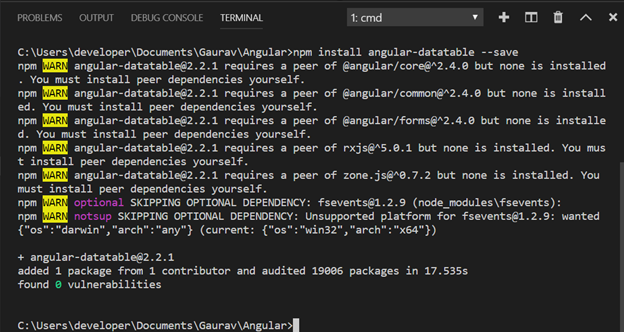 It is required to include DataTableModule in imports array of app.module.ts file.
 Let's also create a service class by using the following command: - ng g s Student 
Let's create a class by using the following command: - ng g class Student  Now, specify the required fields within the Student class. The purpose of this class is to map the specified fields with the fields of Spring entity class.
On clicking Add Student, the following page generates: 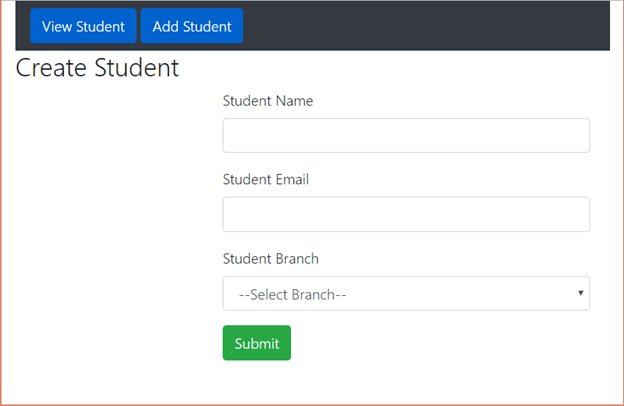 Now, fill the required details and submit them to add student.
On clicking View Student, the following page generates: 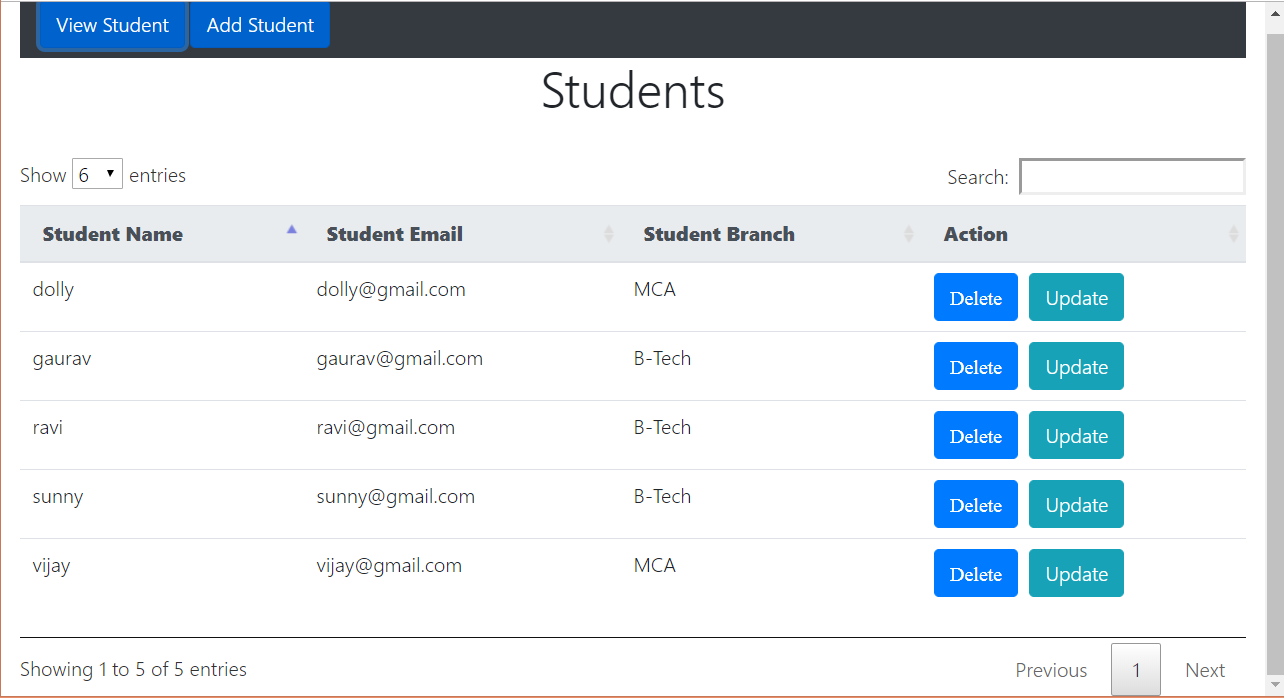 On clicking Update Student, the following bootstrap modal appears: 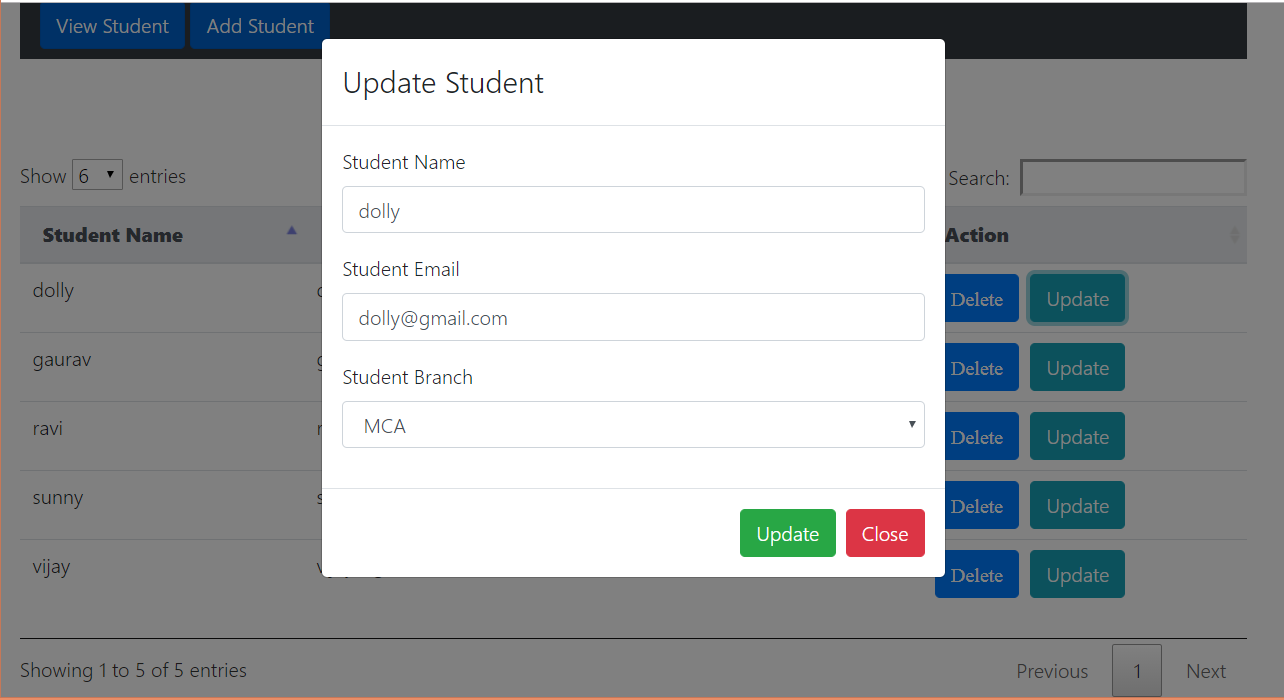 Here, we can update the details of the existing student. On clicking Delete, the existing student is deleted from the database. Let's see the result after deleting the particular student. 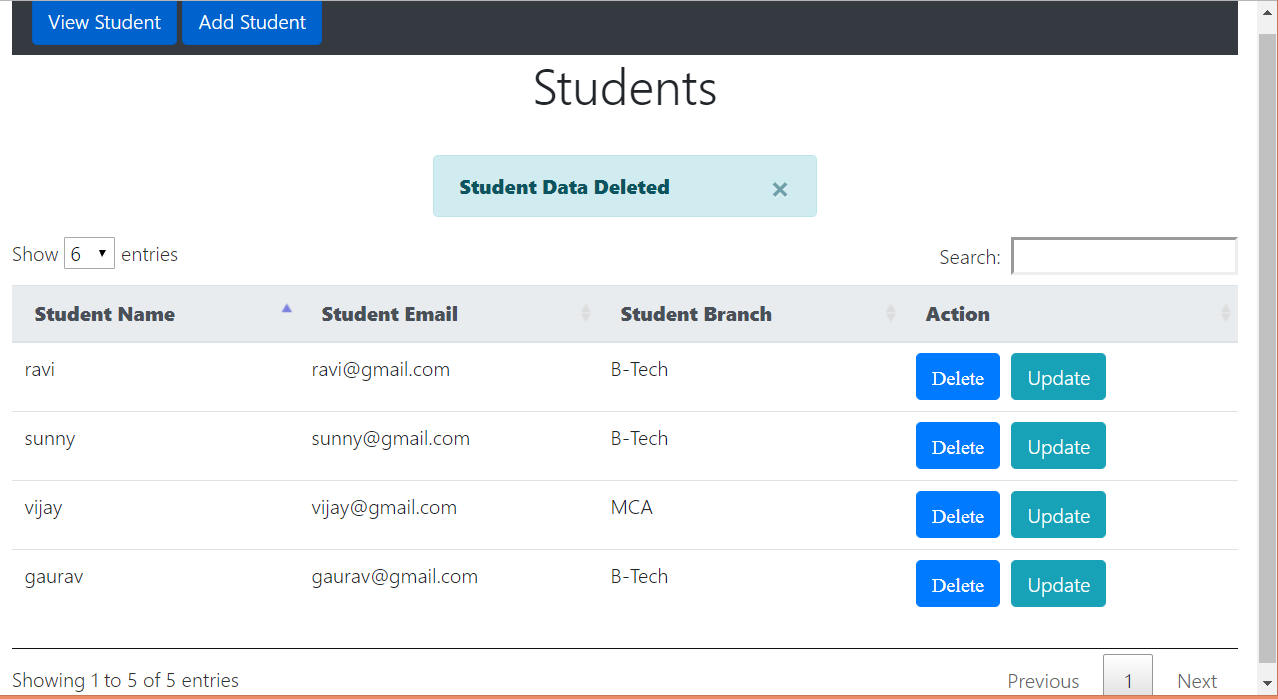
Next TopicFile Upload Example
|